

Right everyone after searching for ages seems like to me noone has actually reconditioned, repaired, fixed the electric window motors on the mini cooper,
I've seen hundreds of posts on the motors jamming and people buying new motors, but why not make the most of the existing motors after all the armature only needs cleaning
If you are capable of removing the winder mechanism, with a bit of patience I am sure you can recondition the motor, so here goes best of luck
First step is to remove the winder mechanism here I will quote Clake's guide as I did not see the need to repeat the work somebody has put the effort into.
I would only only follow this guide upto removing the winder mechanism from the door if you are planning to recondition the old motor.
Clarke's MINI Cooper Window Regulator and motor page
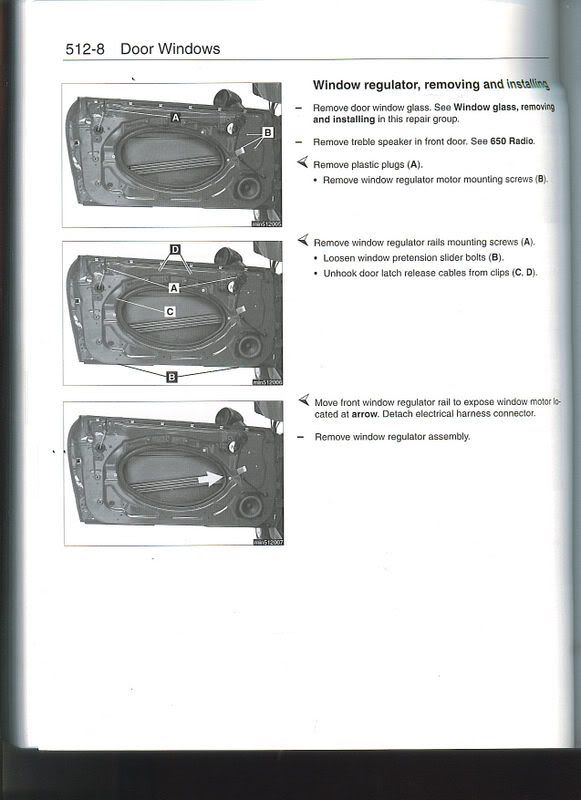
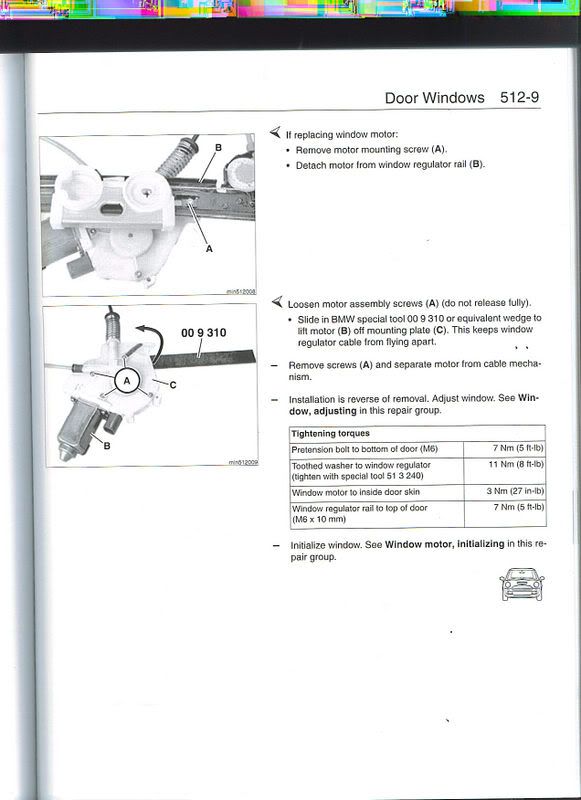
As there are no pictures some nice guy has give a couple of pages out of his haynes manual and these are below. You will find referring to these useful when reading Clarke's guide
![Image]()
![Image]()
Right heres where the fun begins
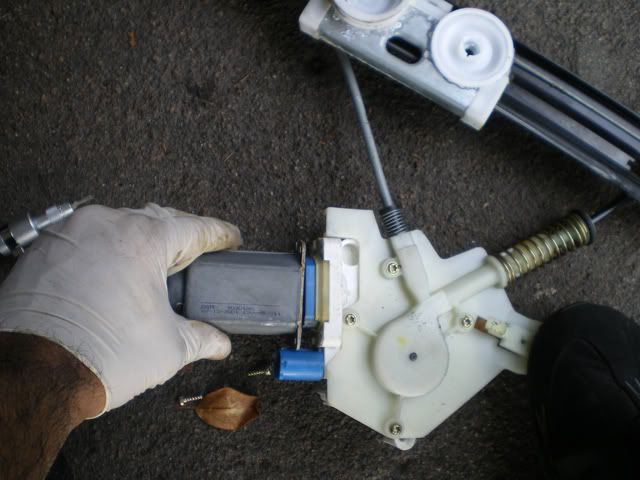
Detach the motor from the mechanism by removing the torx screw in the picture below
![Image]()
Once you have removed the mechanism from the door there are now 2 ways to go about it,
1) The easy way is to leave the motor in the gearing mechanism this way you do not have the risk of the cable getting tangles up and this is the approach I have taken, the only draw back is that when you remove the armature you will have to "screw" it out as it will not be free on the other end. This is by far the method I recommend, as i found it easier and quicker and this is the way I will continue the guide.
2) The other way is to remove the motor from the gearing mechanism as decribed in Clarkes guide as if you are going to replace the motor, this way you will be able to work with the motor more freely, but have the risk of tangling up the cable. Only use this method if you are more confident and are plannig to do more work as if replacing the bushes.
Either way from above you will now have access to the motor and the gearing mechanism
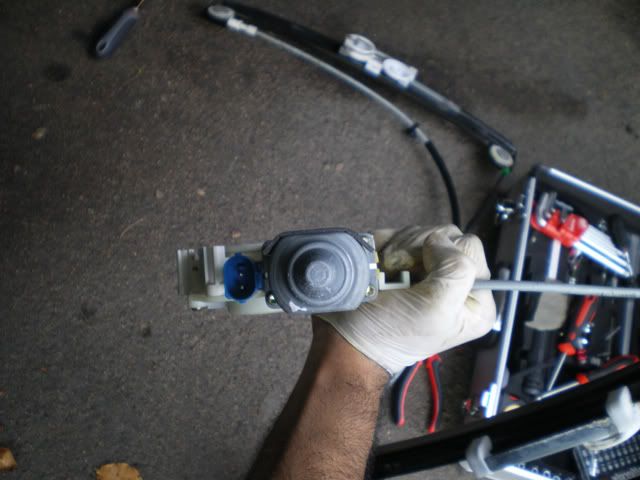
If you are following the 2nd method from above you will remove the motor at this stage,
See below
![Image]()
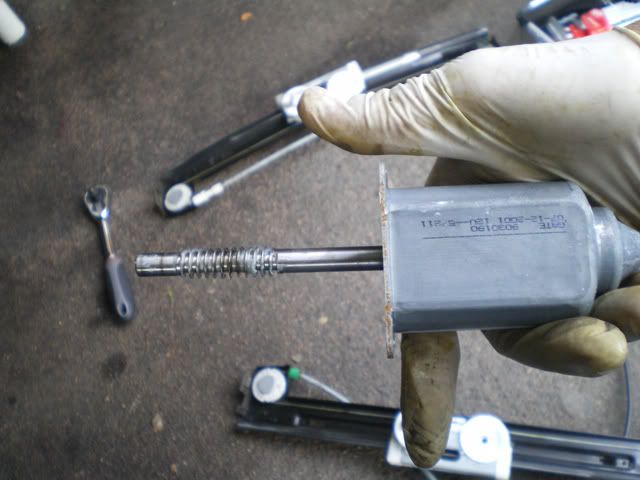
Now this is where you remove the motor casing, by removing the 4 bolts holding the metal casing below.
![Image]()
Important note, mark which way the casing goes in, if it is out by 180 degree your motor will function the opposite way !
Now remove the metal casing by pulling it of, remember there is a bearing on the end so pull it off perpendicular. It will be hard to pull off at the permanent magnets are attracted to the armature.
![Image]()
![Image]()
(If you are following step 2 then the rotor may come out with the casing and will look like this
![Image]()
simply pull out the rotor from the metal casing.)
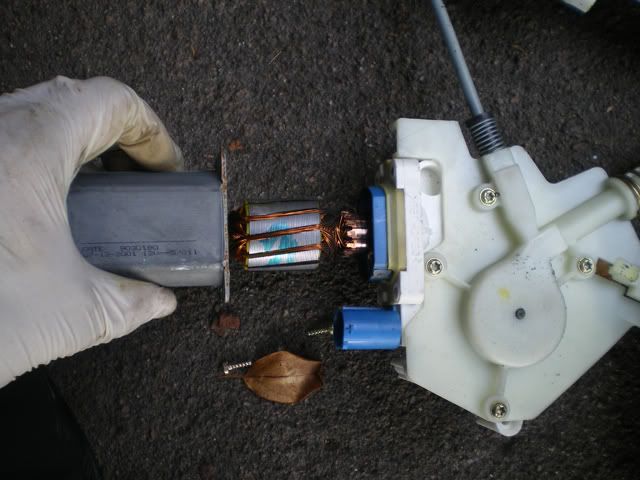
Removing the armature, firstly dont panic the brushes will pop out, I will explain how to put these back together in a bit. Again here is what you do depending on which method you are following from above:
1)If the motor is still connected to the gearing ratio you will have to rotate the rotor to remove it this will inscrew the worm gear
2) If you have removed the motor from the gearing mechanism and the armature has not come out with the metal housing the rotor should just pull straight out.
![Image]()
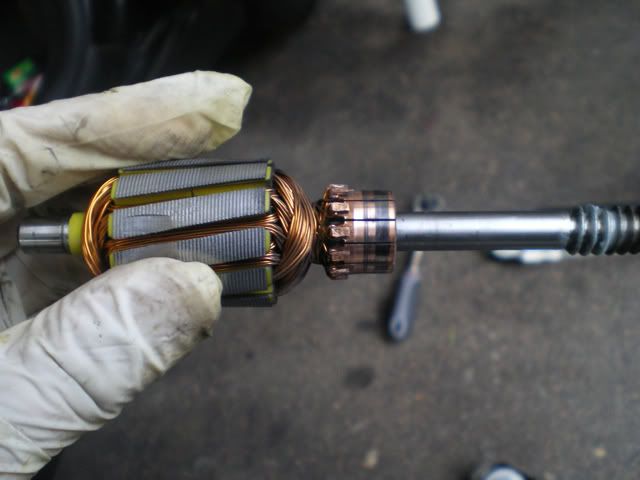
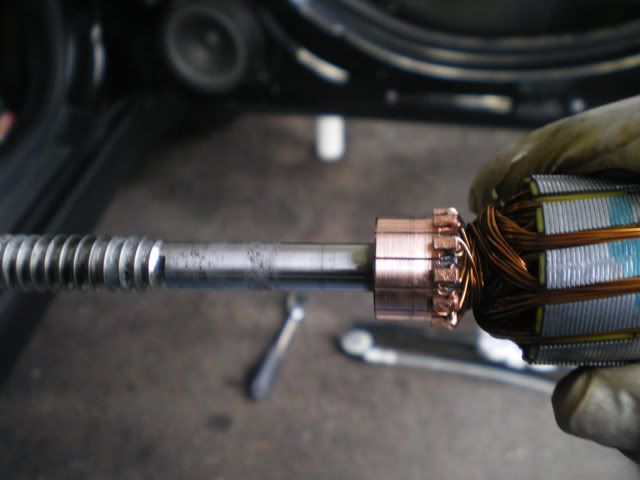
Once the rotor is out, this is your fault, the armature is dirty hence poor contact with the brushes,(this motor was not as bad as the other one but i serviced it anyway)
![Image]()
I used a bit of 1600 wet and dry paper to clean the armature (it was dry !), remember patience, best way to do it i think is to hold the paper and turn the rotor that way you will be taking of a even amount. Once you finish it will look like this
![Image]()
Refitting the rotor into the housing.
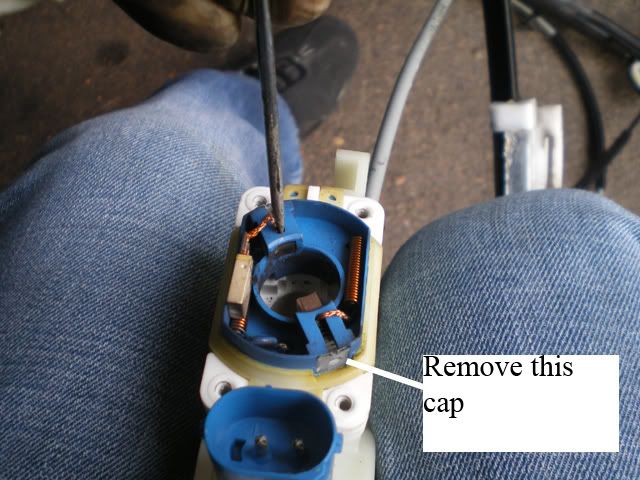
Although I intially thought that we have to hold the brushes on each side with a screwdriver and refit the rotor. I have found that on the opposite end to where the brushes make contact with the rotor there is a white cap. A slight nip with a screwdriver removes the cap and the spring can be removed.
So move the brushes back, slip in the rotor, replace the spring and clip the cap back in place.
![Image]()
Now simply replace the metal housing on the motor (THE RIGHT WAY ROUND) and Voila you have saved the cost of a new motor.
I did find it is possible to change the brushes, but you would have to resize the new brushes and solder them in. May be part II of the guide but for now its working fine.
Hope you find this useful and any questions feel free to email me khurrumsattar@hotmail.com
I've seen hundreds of posts on the motors jamming and people buying new motors, but why not make the most of the existing motors after all the armature only needs cleaning
If you are capable of removing the winder mechanism, with a bit of patience I am sure you can recondition the motor, so here goes best of luck
First step is to remove the winder mechanism here I will quote Clake's guide as I did not see the need to repeat the work somebody has put the effort into.
I would only only follow this guide upto removing the winder mechanism from the door if you are planning to recondition the old motor.
Clarke's MINI Cooper Window Regulator and motor page
As there are no pictures some nice guy has give a couple of pages out of his haynes manual and these are below. You will find referring to these useful when reading Clarke's guide
Right heres where the fun begins
Detach the motor from the mechanism by removing the torx screw in the picture below
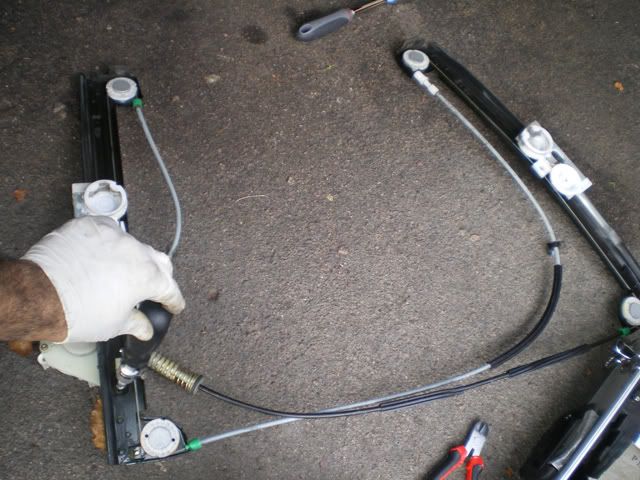
Once you have removed the mechanism from the door there are now 2 ways to go about it,
1) The easy way is to leave the motor in the gearing mechanism this way you do not have the risk of the cable getting tangles up and this is the approach I have taken, the only draw back is that when you remove the armature you will have to "screw" it out as it will not be free on the other end. This is by far the method I recommend, as i found it easier and quicker and this is the way I will continue the guide.
2) The other way is to remove the motor from the gearing mechanism as decribed in Clarkes guide as if you are going to replace the motor, this way you will be able to work with the motor more freely, but have the risk of tangling up the cable. Only use this method if you are more confident and are plannig to do more work as if replacing the bushes.
Either way from above you will now have access to the motor and the gearing mechanism
If you are following the 2nd method from above you will remove the motor at this stage,
See below

Now this is where you remove the motor casing, by removing the 4 bolts holding the metal casing below.
Important note, mark which way the casing goes in, if it is out by 180 degree your motor will function the opposite way !
Now remove the metal casing by pulling it of, remember there is a bearing on the end so pull it off perpendicular. It will be hard to pull off at the permanent magnets are attracted to the armature.
(If you are following step 2 then the rotor may come out with the casing and will look like this
simply pull out the rotor from the metal casing.)
Removing the armature, firstly dont panic the brushes will pop out, I will explain how to put these back together in a bit. Again here is what you do depending on which method you are following from above:
1)If the motor is still connected to the gearing ratio you will have to rotate the rotor to remove it this will inscrew the worm gear
2) If you have removed the motor from the gearing mechanism and the armature has not come out with the metal housing the rotor should just pull straight out.

Once the rotor is out, this is your fault, the armature is dirty hence poor contact with the brushes,(this motor was not as bad as the other one but i serviced it anyway)
I used a bit of 1600 wet and dry paper to clean the armature (it was dry !), remember patience, best way to do it i think is to hold the paper and turn the rotor that way you will be taking of a even amount. Once you finish it will look like this
Refitting the rotor into the housing.
Although I intially thought that we have to hold the brushes on each side with a screwdriver and refit the rotor. I have found that on the opposite end to where the brushes make contact with the rotor there is a white cap. A slight nip with a screwdriver removes the cap and the spring can be removed.
So move the brushes back, slip in the rotor, replace the spring and clip the cap back in place.
Now simply replace the metal housing on the motor (THE RIGHT WAY ROUND) and Voila you have saved the cost of a new motor.
I did find it is possible to change the brushes, but you would have to resize the new brushes and solder them in. May be part II of the guide but for now its working fine.
Hope you find this useful and any questions feel free to email me khurrumsattar@hotmail.com
")


![IMG_2179[1].jpg](/d1/attachments/20/20613-377f82a643786d26c4a5ab273abe3486.jpg)
![IMG_2180[1].jpg](/d1/attachments/20/20677-2e7e3eb72aed5d70038c49a46a4c2b57.jpg)


