MINI Cooper Forum banner

R56 Mini Cooper non turbo- Exhaust Clamp stuck- how to release?

12K views 51 replies 7 participants last post by  cflursch  
#1 ·
Hi

I am working on taking the head off and at the moment removing the exhaust manifold/catalytic convertor assembly.
I have run into a problem after loosened the nut it to be stuck and I have applied penetrating oil and tapped it but it won't release? Any other ideas?
Thanks
Image
 
#6 ·
Thanks for the tip. That sounds logical, I will try that as well. Do you have any recommendations to removed these last set of nuts for the manifold. The heat shield sort of blocks extender arms and it seems if I want to remove the front heat shield I need to removed the o2 Sensor and that's hard. Is that panel around the o2 sensor nut removable ?
281426
281427
 
#7 ·
Have you got the car in front-end service mode ? I managed to get the head off without doing this but when I subsequently had to replace the oil-filter housing gasket (common failure) which necessitated doing this I realised how much easier the job would have been if I had done. It was fiddly getting those manifold nuts off but with a variety of short and long sockets, wobble extensions and universal adapters I managed.
O2 sensor has to come out to get the heat shield off.

Front-end service mode and other helpful bits are in this video:-
 
#8 ·
Hi thanks for the note, I don't have it in service mode at the moment but realize it would have been easier. So far I am pretty close, just those 3 nuts left and the clamp but yeah realize it would have been easier in service mode right from the start. I will do that for the re-install. I do have a variety of flex, and universal joints. I will just keep at it :) . I do have the o2 sensor sockets but they're real hard to remove at this angle.
 
#11 ·
pcv hose deffo a problem needs new one or might need a new rocker cover as well , i've done them like before its just getting to 10mm off heat shield,, also removing the exhaust studs from head a must ( and have had them snap the torq head off them a lot) or when refit head on to gasket you can damage the gasket or head surface on the round location dowls,, also when i do them and cars over 80k on factory chain etc the cat needs replacing on nearly all of them to ensure it dont destroy the work just done, hence why i've always said to people best to pull the lot out and replace while its there, also takes me 30 mini to pull front away and make room and saves my hands lol,
also while front off can clean out the oil filter housing and check the valves in the bottom of it, on turbo cars the oil feed pipe to turbo when gets moved will leak after or soon after and can take turbo out when does ,, and to replace that need to pull cat off anyway, its also easier to remove sump bolts with cat off as two of the 8mm bolts are pain to get at with it still on,,, this all said good effort hopefuly the put back together will go as well,,
 
#12 ·
Hi @mike1967 and @Angst thanks for the tips. looking at your photo Mike was wondering do you think I need to actually remove the intake manifold and purge solenoid? I imagine the main thing is to ensure that these things are just detached from the head- right? But the Chilton procedure says to remove them completely?
 

Attachments

#13 ·
cant comment on any manuals never use them . but i always move it all out the way just ensures when put head back on less to think about and less to get caught up
 
#18 ·
@mike1967 and @Angst thanks for all the advice, I put the front end in service mode (wasn't too hard actually except the banging on with a small sledge hammer was interesting) and was able to jiggle the exhaust manifold assembly out the bottom. BTW: I need to get the gas out of the tank, do you have any tips on that, I read pump out of fuel pump lid?? View attachment 281478 View attachment 281479
yes that horrible 10mm bolt at bottom of manifold can be accessed best from wheel arch inwards on right hand drive cars its drivers side ie wheel off and i use a 1/4 drive 10mm socket on a 2 long extension bars on turbo cars, and just a rachet and small bar on non turbo cars as the bolt is a bit different between the manifolds,
Hi @Angst and @mike1967
I took the wheel off and surveyed the bolt. Do I need to just remove the bolt on the manifold or also the bracket its attached to which bolts to engine??. See this picture
281551
 
#19 ·
just the 10mm bolt
 
#21 ·
cab you remind us what your doing to it
 
#22 ·
I am removing Cylinder head for rework. So far removed most of the attachments and now up to removing the timing chain assembly. So have to remove this pulley hub. The repair manual says remove these bolts on the hub and then the actual pulley bolt but then I saw I video where the guy just removed the pulley bolt with the hub attached. Which is correct? Thanks
 
#23 ·
you can keep the pully attached i remove the 3 torx bolts and pull pulley off before the centre boss that holds the cam chain sprocket as will when come to put back together find it easier to get boss back in square as such ,, heads up when pulling the boss out or even when pully still attached dont lever it to hard as can hurt the surfaces where oil seal sits ,
i always lock the engine with timing lock kit before pulling chain off etc as this will ensure nothing can get bent ,, its just just good work practice to lock it off before pulling any chain or head off puts all the pistons out way of any of the valves etc
 
#24 ·
you can keep the pully attached i remove the 3 torx bolts and pull pulley off before the centre boss that holds the cam chain sprocket as will when come to put back together find it easier to get boss back in square as such ,, heads up when pulling the boss out or even when pully still attached dont lever it to hard as can hurt the surfaces where oil seal sits ,
i always lock the engine with timing lock kit before pulling chain off etc as this will ensure nothing can get bent ,, its just just good work practice to lock it off before pulling any chain or head off puts all the pistons out way of any of the valves etc
Got it thanks and I have locked the cams. What about locking pin in flywheel? I read I should temporarily remove the locking pin when removing pulley? What size are those 3 torx bolts?
 
#26 ·
#27 ·
Hi

I am working on taking the head off and at the moment removing the exhaust manifold/catalytic convertor assembly.
I have run into a problem after loosened the nut it to be stuck and I have applied penetrating oil and tapped it but it won't release? Any other ideas?
Thanks
View attachment 281394
Hi

I am working on taking the head off and at the moment removing the exhaust manifold/catalytic convertor assembly.
I have run into a problem after loosened the nut it to be stuck and I have applied penetrating oil and tapped it but it won't release? Any other ideas?
Thanks
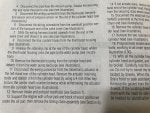
View attachment 281394
I wish I saw this earlier. I ended up using a self made tool with wrenches and some screws that I had laying around to resemble bow opening pliers.
 
#29 ·
if its locked you will not be able to crank both ways with a ratchet bar as hard as you can,, if locked one way only then its a false point ie caught a dip in flywheel
 
#31 ·
they are hard to get locked if dont use two equal long rods ie around 300mm each drop each one in number 1 and number 2 turn crank until both at same level with the writing at top on camshafts thats how do them its fairly easy doing this method
 
#32 ·
@mike1967 Thanks for the tip, I got this locked. I used 2 crossbow bolts as markers in CYL1 and CYL2, also put a bamboo skew into the hole and noted it's only 38mm deep so realized the locking tool doesn't have to go completely in but 38mm in [see pics]. I removed the crank pulley hub using E10. Now ready to remove crankshaft bolt. it's really tight, do you think I need to use the crankshaft removal tool [83300493940 BMW and MINI Crankshaft Holder Tool Genuine BMW/MINI 83.30.0.493.940 83300493940 83 30 0 493 940 83-30-0-493-940 | Pelican Parts Any other tips to loosen it? Is there a chance the locking pin could snap if I don't use the removal tool?
281963
281964
 
#33 ·
i used the crankshaft locking pin to hold crankshaft while undoing the 18mm bottom bolt same when do the bolt back up again , i've done more than 300 hundred of these engine by a long way with same bottom lock pin and still shows no signs of breaking or snapping,, that is using a laser lock tool , i also have a cheap china kit i bought in the very early days that prob done 100 times and still not broken,, the cheap china tool i stopped using it after lending ot to someone who did not clean their ears out on that morning when i told them DO NOT USE TOP CAM LOCKS TO HOLD CAMSHAFT WHILE UNDOING OR DOING THE BOLTS UP, USE 27MM SPANNER ALWAYS, OR WILL BEND THEM OPEN, did find the cheap ones were a few degress out did compare them with the better laser tools kit and found could use feeler gauge to remove any float but still would only use a good lock tool for these engines
 
#35 ·
dont need to see the writing as the where the cam locks sit they only have one surface that is not rounded to locate to the lock tools
 
#38 ·
that piston is done need to fit new piston in both the damaged bores with broken valves, so sump off re ring and hone the bores ,, they do this when the over heat or lean out when engine leans out on petrols the combustion temps go through the roof and melt things it also gets head so hot the valve seats drop out like that ,, so you need to find out why it done it , ie thermostat or water pump or fueling issues
 
#39 ·
will add the last one i done like that i also found the crankshaft had been nailed as engine must of run so hot that oil thinned out and damaged the mains as well so you will need to check crankshaft at same time for sure , hopefully not cracked the head or warped it badly
 
#40 ·
@mike1967 when I talked to the machine shop and he also think's pistons are damaged and likely crank and bearing. With the head rework he said it was worse than what I described over the phone so after inspecting things the rework is close to $1000USD. He think with the piston work and the head, it might be worth considering low mileage engine replacement instead. Said he could find more stuff damaged in head. He also thinks the melted bits on piston and the head are not the dropped seat, said something else could have disintegrated and blown around intake manifold as there is one small chard in CLY4. Here are some close ups of the pistons after clean up. Thoughts?
282280
282281

282282

282283
 
#41 ·
pistons are screwed pull sump have a look at bearings check for impact damage on bearings , i've done a few that bad and only fitted new bearings and pistons and rings the bores look fine so hone those ,, but you must check the crank as i fear it might of got that hot it dropped valve seats out of head ie the top end damage and could of thinned the oil and destroyed the crank is very possible ,, safe way is replace the motor
 
#42 ·
Got it. Yeah make sense. I am taking my time on this and no rush to drop in another engine yet so might as well take rest of engine apart to see extent of damage. My next problem is the drain plug was overtorqued so its threaded? is there a good way to remove the drain plug or does it really matter now and I should just remove the oil pan? Also how what would you recommend about supporting the engine now? I have block of wood under the oil pan (since head is off) but if take out oil pan to get to crank etc where do I move the wooded block?
282307
 
#43 ·
drain plug is allen key , metric size,
 
#44 ·
I know 8mm, I got a 8mm hex bit socket and it's basically struck/threaded. Won't really move. I read some articles that some oil change over torque drain plugs in so they become threaded when you try to remove. Some article said to use JBweld with the hex bit or something like that?
 
#46 ·
you need set of torx females as per below
remember ,,,,,,YOU MUST MARK THE END CAPS DIRECTION AND PISTON DIRECTION AND WHAT CYLINDER IT CAME OUT OF, ALL THE END CAPS ARE MATCHED TO EACH ROD ,,,, DO NOT MIX THEM UP,
 
#47 ·
you need set of torx females as per below
remember ,,,,,,YOU MUST MARK THE END CAPS DIRECTION AND PISTON DIRECTION AND WHAT CYLINDER IT CAME OUT OF, ALL THE END CAPS ARE MATCHED TO EACH ROD ,,,, DO NOT MIX THEM UP,
@mike1967 Thanks and I got all these out. Piston #2 which is damaged was hardest to get out and #1,3,4 all came out smoothly. I got recommendations if I got complete rebuild path I should replace all 4 pistons + rings. Is that your recommendation as well? Also do you know what the honing tolerance of these cylinders is? They are 77mm so wondering what tolerance honing should be? Also do you have any tips for checking damage with a bore gauge?
PICs attached
Image

Image

Image